Customize Home AX: Difference between revisions
(→Exit) |
(Chime.Center formatting) |
||
| (4 intermediate revisions by one other user not shown) | |||
| Line 1: | Line 1: | ||
<div style="font-size:84%"> '''[[Chime_Master_Help|Help]] » [[Operating manuals]] » [[:Category:AX_Manual|AX Table of Contents]]'''<br/> | <span class="crumbs"><div style="font-size:84%"> | ||
''' [[Settings_screen_AX|← Settings screen]] [[Date_and_Time_AX|Next section →]] '''</div> | '''[[Chime_Master_Help|Help]] » [[Operating manuals]] » [[:Category:AX_Manual|AX Table of Contents]]'''<br/> | ||
''' [[Settings_screen_AX|← Settings screen]] [[Date_and_Time_AX|Next section →]] ''' | |||
</div></span> | |||
The menu screen and phone remote for Chime Master AX ringing systems are fully customizable on a per user basis. Add and edit quick function buttons for immediate access to common ringing features and favorite hymns. Remove buttons to simplify menus for users who do not need certain features. | |||
<embedvideo service="youtube">https://youtu.be/QU4zVBiX9QU</embedvideo> | |||
== Front panel menu == | == Front panel menu == | ||
| Line 40: | Line 46: | ||
*'''Suspend Schedule''' | *'''Suspend Schedule''' | ||
** When the schedule is active, the button appears | ** When the schedule is '''active''', the button appears '''red''' and is labeled ''Suspend Schedule'' | ||
** When the schedule is suspended, the button appears | ** When the schedule is '''suspended''', the button appears '''green''' and is labeled ''Resume Schedule'' | ||
:Tapping the button when it is red prompts you for an ending date and time for schedule suspension. | :Tapping the button when it is red prompts you for an ending date and time for schedule suspension. | ||
:Tap the button when it is green to immediately resume scheduled ringing. | :Tap the button when it is green to cancel the suspension timer and immediately resume scheduled ringing. | ||
*'''Keyboard screen''' | *'''Keyboard screen''' | ||
| Line 57: | Line 63: | ||
Review all of your selections by scrolling to the bottom of the page. When all of the parameters are entered tap the Save button at the bottom of the screen.<br />If you exit using the home button at the top of the screen you abandon your changes. | Review all of your selections by scrolling to the bottom of the page. When all of the parameters are entered tap the Save button at the bottom of the screen.<br />If you exit using the home button at the top of the screen you abandon your changes. | ||
== Using Chime Center == | == Using Chime.Center == | ||
The instructions above for the front panel screens also work for Chime Center. If your PC has a touch screen, you can tap to move the buttons like on the front panel. Reordering the buttons with a mouse is a simple click and drag operation. | The instructions above for the front panel screens also work for Chime.Center. If your PC has a touch screen, you can tap to move the buttons like on the front panel. Reordering the buttons with a mouse is a simple click and drag operation. | ||
==== Edit My Home Screen ==== | ==== Edit My Home Screen ==== | ||
You can edit your home screen remotely using Chime Center. Click on the colored circle with your initials and select My Account and Customize Home Screen. | You can edit your home screen remotely using Chime.Center. Click on the colored circle with your initials and select My Account and Customize Home Screen. | ||
==== Edit Home Screen for Other Users ==== | ==== Edit Home Screen for Other Users ==== | ||
Administrators have the ability to edit the home screen of their Chime Center users. Navigate to [https://chime.center/ax/#/manageusers '''Settings > User'''] (you may click this link if already logged in to Chime Center). Click the edit button for the user for whom you wish to edit the home screen. On the edit screen click User Home Menu. | Administrators have the ability to edit the home screen of their Chime.Center users. Navigate to [https://chime.center/ax/#/manageusers '''Settings > User'''] (you may click this link if already logged in to Chime. Center). Click the edit button for the user for whom you wish to edit the home screen. On the edit screen click User Home Menu. | ||
== Remote home screen == | == Remote home screen == | ||
[[File:ChimeCenterRemote.jpg|link=Remote_AX|frameless|right|200px]] | [[File:ChimeCenterRemote.jpg|link=Remote_AX|frameless|right|200px]] | ||
The customized home screen buttons will also appear on the smart phone [[Remote_AX|Remote app]] with the Stop and Next buttons | The customized home screen buttons will also appear on the smart phone [[Remote_AX|Remote app]] with the Stop and Next buttons. If they do not appear right away, you may have to [[Remote_AX#Update_your_remote|update your remote]] (not rescan the code). | ||
<br/> | <br/> | ||
<div style="font-size:84%"> ''' [[Settings_screen_AX|← Settings screen]] [[Date_and_Time_AX|Next section →]] ''' | <span class="crumbs"><div style="font-size:84%"> | ||
''' [[Settings_screen_AX|← Settings screen]] [[Date_and_Time_AX|Next section →]] ''' | |||
</div></span> | |||
[[Category:AX Manual]] | [[Category:AX Manual]] | ||
Latest revision as of 18:30, 23 January 2026
The menu screen and phone remote for Chime Master AX ringing systems are fully customizable on a per user basis. Add and edit quick function buttons for immediate access to common ringing features and favorite hymns. Remove buttons to simplify menus for users who do not need certain features.
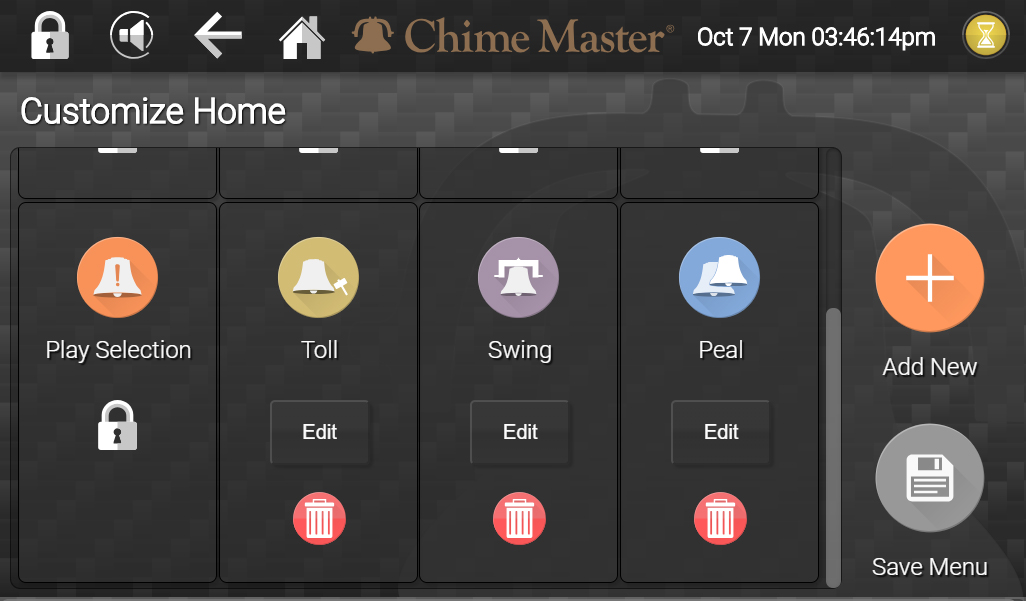
Tap Settings on the home screen, then tap Customize Home on the settings menu. Add, remove and change Home Screen buttons and their functionality with this screen.
All of the home screen buttons are shown on the Customize Home screen as labeled icons with either locks or editing buttons below them.
Essential home screen buttons have the locks below them and cannot be removed or edited. Customizable buttons provide both an Edit button and a trash bin below them.
Remove items
Remove unneeded buttons from the home menu by tapping the trash bin below them.
Edit or Add
Change the actions for an existing button by tapping its Edit button.
There are two ways to add a new button:
- Tap Button Storage
- Button storage contains buttons that exist on your system that are not on your home screen. These may have previously been removed from your screen or created by other users of your system. Check boxes next to each button you want to add, then click Add Checked at the bottom of the screen.
- Tap Add New to create a Home Screen button.
- Tap Change Icon to see available icons for your function. Tap one of the icons then tap Select. Tap the Name field to create a unique label for your new button. Select the functionality of the button from one of the following Types.
Select Type
Select the type of button you want to add to the user's home screen using a pull down menu:
- Play Specific Selection
- This button provides a quick concert from one to four specific titles. Options on the edit screen allow you to search within categorized lists to find your selection(s).
- Play Album
- Play from the selected Album. Choose to play through the Album in its entirety, for a duration of a number of minutes or a number of songs.
- Play using SmartAlmanac
- Play denominationally and seasonally appropriate random music (as set up using the SmartAlmanac™) for a duration either of a number of minutes or a number of songs.
- Custom Toll
- This button prompts for either the number of strikes or minutes to toll, a tempo for the toll and select a tolling bell. All settings are saved for the next usage, so you can play without entering specific parameters.
- Suspend Schedule
- When the schedule is active, the button appears red and is labeled Suspend Schedule
- When the schedule is suspended, the button appears green and is labeled Resume Schedule
- Tapping the button when it is red prompts you for an ending date and time for schedule suspension.
- Tap the button when it is green to cancel the suspension timer and immediately resume scheduled ringing.
- Keyboard screen
- You can restore the keyboard button if it has previously been removed.
- Remote screen
- Restore the Remote button if it has previously been removed.
Reorder buttons
Tap and hold your finger on any button on the edit screen. It will detach from its location and move as you continue to move your finger around the screen to its new location. Removing your finger from the screen will exit the reordering function so you can select and move other buttons the same way.
Exit
Review all of your selections by scrolling to the bottom of the page. When all of the parameters are entered tap the Save button at the bottom of the screen.
If you exit using the home button at the top of the screen you abandon your changes.
Using Chime.Center
The instructions above for the front panel screens also work for Chime.Center. If your PC has a touch screen, you can tap to move the buttons like on the front panel. Reordering the buttons with a mouse is a simple click and drag operation.
Edit My Home Screen
You can edit your home screen remotely using Chime.Center. Click on the colored circle with your initials and select My Account and Customize Home Screen.
Edit Home Screen for Other Users
Administrators have the ability to edit the home screen of their Chime.Center users. Navigate to Settings > User (you may click this link if already logged in to Chime. Center). Click the edit button for the user for whom you wish to edit the home screen. On the edit screen click User Home Menu.
Remote home screen
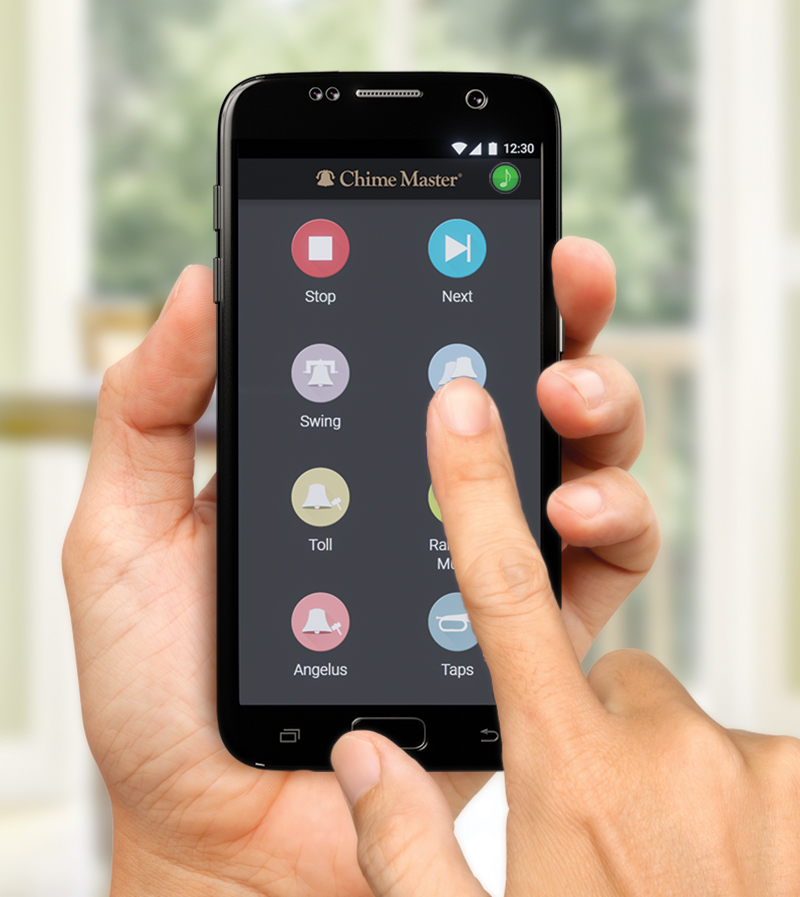
The customized home screen buttons will also appear on the smart phone Remote app with the Stop and Next buttons. If they do not appear right away, you may have to update your remote (not rescan the code).

