Main Menu MS2201P: Difference between revisions
(full scale coordinates) |
mNo edit summary |
||
| Line 4: | Line 4: | ||
rect 429 33 571 141 [[Settings_MS2201|Settings]] | rect 429 33 571 141 [[Settings_MS2201|Settings]] | ||
rect 430 140 573 249 [[Administration_MS|Administration]] | rect 430 140 573 249 [[Administration_MS|Administration]] | ||
rect 0 140 146 350 [[Scheduler_special_Events_MS|Schedule Special Events]] | |||
rect 0 350 146 460 [[Tempo_and_Transposition_MS2201|Change music tempo or key]] | |||
rect 146 34 288 140 [[Backup_MS|Backup and Restore]] | |||
rect 288 34 430 140 [[Jukebox_MS|Jukebox Concert]] | |||
rect 146 245 288 245 [[Music_librarian_MS|Random Music Librarian]] | |||
default [[Image:Suite-5-10-menu-2201ptr.png]] | default [[Image:Suite-5-10-menu-2201ptr.png]] | ||
desc none | desc none | ||
Revision as of 22:22, 5 October 2015
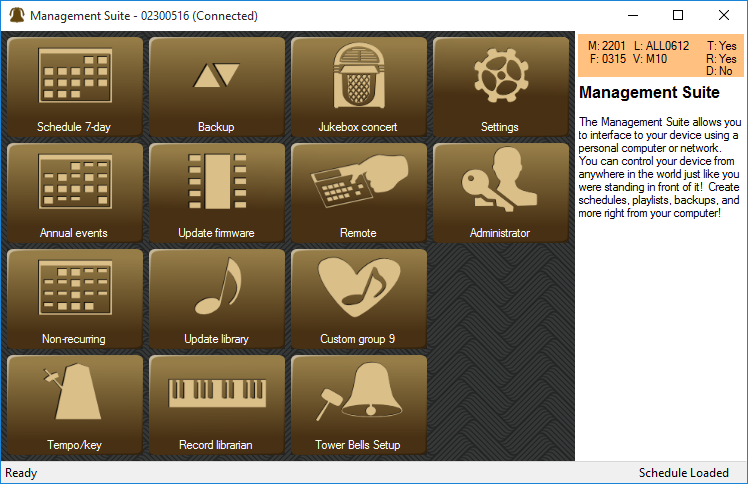
This is the Main Menu for Premium Management Suite connected to the Platinum Carillon with options for the recording librarian and tower bell control.
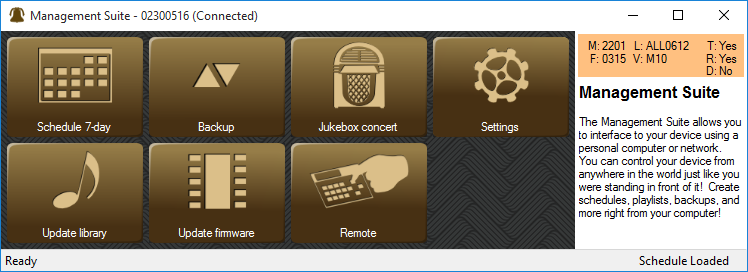
This is the Main Menu for the Free Management Suite.
Depending on the capabilities of your Chime Master system and its firmware revision, you may have fewer or additional buttons compared to the panels above.
Buttons will gray out if the carillon is in a mode that cannot support them (such as when it is playing).
Menu Customization
Right clicking your mouse in the button area of the main menu allows you to customize the menu. You can hide the details panel displayed on the right of the window, resize buttons and hide buttons you don’t use. The default button sizes are handy for a touch screen, but feel free to make them smaller if you always use a mouse.
Holding the left mouse button over an icon button allows you to re-position it in the menu.
Carillon Model Details
Other information pertaining to the connected carillon will be displayed in the upper right-hand box. A customer service representative may request these if you call for technical support. You can hide this box by right-clicking on the panel and de-selecting View-Details.
- M = Hardware Model
- F = Firmware Version (MMYY)
- L = Library Catalog Version
- V = Voices determines top level Model
- T = Tower Bells option (Y/N)
- R = Recording librarian option (Y/N)
- D = Clock Dial interface (Y/N)
Status Bar
Normally the left side of the status bar will say it is Ready. Some features require the carillon to enter a dedicated communications mode called Slave Mode when writing to FLASH memory. Switching between slave and ready modes may cause the carillon to reboot, resulting momentary delay. The status bar at the bottom of the application screens indicates the current mode of the carillon.
At the right end of the status bar you can see the schedule status. If a macro schedule has become active it will be displayed so you know which one is currently active. If the schedule edit mode has uploaded the schedule it will say Schedule Loaded.
Always make USB connections to the carillon before starting Management Suite. Allow a few seconds after connecting for the drivers to load.

